Showing posts with label 3D. Show all posts

Thursday, March 31, 2016

New projects!

Hi guys!  It's been way too long since I've posted!  About 3 weeks ago, things went INSANE at work, my Etsy store and business picked up big time and I discovered 24 hours in a day wasn't enough to do it all!

We've had two of us doing the work of four and I've been working a lot of overtime.  The paychecks will be nice, but I'm done!  We have a new person starting in 3 weeks, so the countdown is on.  All this overtime would have been tolerable on its own....but for some reason, I got a gazillion orders and projects during this time as well.  Now, I'm not complaining about God blessing my business.  I am just tired!

Since I haven't had time to craft for myself and post, I thought I'd at least share some pics of what I've been doing....


My co-worker asked me to make this "faux" ticket for her to give her dad on his birthday.  She and her sisters got him tickets to the Lakers/Thunder game and this was how they told him.  What a cute idea!  I would have never thought of that I totally enjoyed it.  I laminated it so he could keep it.  She said he loved it!

I also did several Easter baskets.  I forgot to take pictures of a couple, but here are two of them.

Please ignore the bad pics... I took them at my desk at work.


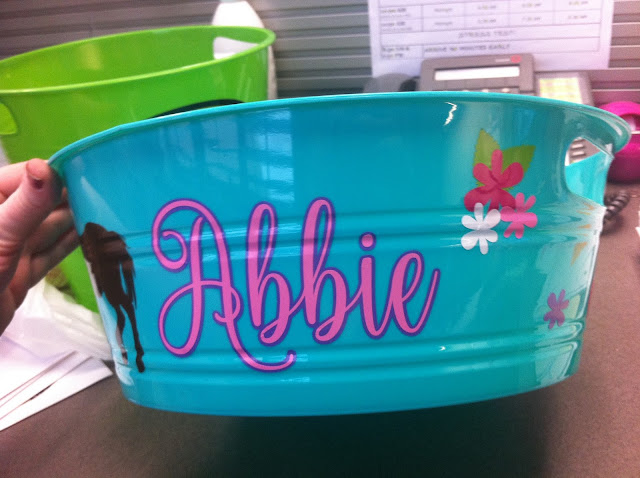
This is an Easter basket for a very sweet, lovely young lady.


 She loves horses and wants to grow up to be a vet. 


Her mom chose the colors to match her room, so she could use the basket after Easter.


This is for her brother, Trey.  He loves super heroes and his favorite is Batman.

One last project...


I made several personalized bunnies for Easter.  This was for a co-worker to mail to her niece.

I have several other projects to share, but not today.

Hugs,
Cheryl


Saturday, December 5, 2015

Rudolph Lip Balm Holder

It's Christmas Time!  I love it.  I love the lights and the parties and even the crowded stores.  I completely enjoy this time of year.

One of my greatest joys is giving gifts that bring a smile to some one's face.  I don't have a ton of extra cash (paying off debt...ugh!) so I try to make the small gifts I can afford more fun.  We're doing Secret Santa at work and right now I'm compiling a bunch of small goodies to leave for her over the next few weeks.

Here's the first one...


I downloaded the reindeer file from the Silhouette Store.


I used a scalloped frame in the background.  I used the offset feature to make an outline, then added text.  The font is Grandma's Garden and you can get it at DaFont.


It wasn't designed to hold the lip balm, so I had to alter the shape of his nose to fit it.  I have seen these all over Pinterest and I think they're adorable!  I looked at several printables and used them as a starting point for sizing the hole for the nose.  This particular lip balm isn't the name brand, it's Walgreen's brand and it's a little more oval shaped than the original.

I really hope the recipient likes this!  I am going to leave it for her on Monday, so we'll see.  I have made a few other projects, but didn't have time to photograph them until today.  I'll share those later in the week.

Hugs,
Cheryl

Wednesday, October 28, 2015

Halloween Cheezy Poofs!


Halloween is just around the corner.  Are you ready?

Every holiday, I have great intentions.  I decide I’m going to make these fabulous treat bags or boxes full of fabulous goodies for my family, friends and co-workers.  Most holidays, I’m good to just show up with whatever I agree to bring, much less something cutesy and fun.  I have a tendency to bite off more than I can chew and then I run out of time for the fun things… like making treat bags!

This year, however, I have turned over a new leaf.  I am trying to stop doing things out of obligation and do more of what I want, in my downtime. 

So, guess what?  I made Halloween bags for my co-workers!  I totally stole the idea from Pinterest, so I can’t take credit for the creative genius, but I did them my own way. 

I started with a GIANT tub of cheezy poofs.  (Yes, I realize they are actually called cheese puffs, but thanks to my husband and his younger days of watching Southpark, they will forever be known as “cheezy poofs” in our household!)


That sucker is massive, huh?  You can see my Silhouette machine to the right, just for scale.  I got this whole tub at Sam’s for about $6.00.  What a bargain!

I bought some treat bags and measured them to see how much space I had for the faces.  On Pinterest, everyone had drawn the faces using Sharpie markers.  What?!?!?  They obviously don’t own a Silhouette.

I went to Google and searched “jack o lantern faces clip art” and got tons of cute little faces.  I imported a few of them into design studio, then traced them.  Voila!  I cut the faces from some scraps of black vinyl I had in my stash and applied to the bags. 


After all the faces were applied, I filled them with cheesy goodness and tied with twine.  Sooooo cute!


I love these little guys!  


If you haven’t yet made Halloween goodies, this is an easy and quick project you could do tonight.  Of course, if you try it, I’d love to see your pictures.


Happy Wednesday!
Cheryl

Tuesday, September 22, 2015

Hello Kitty!


Anyone remember this store?  We had one at a mall here when I was younger.  I loved this store! Mainly because I love Hello Kitty, but also because they had the coolest stuff.

Ahhh...memories.  {sigh}

This past Sunday, we had our monthly fellowship and potluck at church.  There is usually a theme and this month was "Pinterest".  We were asked to sign up to decorate tables and get our ideas from Pinterest.

I signed up and got online. After many, many hours spent perusing Pinterest and changing my mind 72 times, I decided to do a Hello Kitty table.

Wanna see?

My friend took this picture.  I was on a budget, so I resorted to basically using my Silhouette to do 95% of the table.  That's a lot of pink... and I love it!


How adorable are these plates?  Yeah, I can't take credit for them.  Totally a Pinterest steal, but they're still cute.


Another Pinterest steal.  I used a circle punch and some vinyl to jazz up the cups, then added bows to the straws.  Only one person didn't want to drink from the bow straw and he was a man.  Go figure....ha ha.


This centerpiece was a pain in the you know what!  As I said, our budget is tight right now so I was trying to use things we had on hand.  I didn't have a vase to use, so we stuck some plastic risers together and wrapped them with paper.  Not the cutest thing ever, but it worked.  This looks lopsided and I did fix it, but it was after I took the picture.  I love those rainbows!


So the plan was to hang three balloon flowers above the table.  And that I did...sorta.  This flower looks great, but the others not so much.  Apparently, manipulating balloons is not my forte.  They all started out as flowers, but one of them turned into a nice cloud-like group of balloons with no shape.


Someone took this with my phone, so I apologize for it being blurry, but I wanted to show the entire table.  If you need cheap decor for a party, you can't get cheaper than this.  I spent less than $5.00 for the entire table.  It took some labor and my Silhouette did most of the work, but I love how it turned out.


All the "confetti" on the table was cut with my Silhouette Cameo.  I googled Hello Kitty and found several images.  I then imported them into the software and used the trace feature.  I love that trace feature!!  It's awesome.  If you've never used it, don't be scared.  It's easy and wonderful!

Have a happy Tuesday!
Cheryl


Tuesday, August 18, 2015

Pencil Boxes


I don't have kids.  Most people know this about me, but in case you don't, there it is.  I always wanted to be a mom and do "mom things".  One of those things was to be homeroom mom.  Do you remember that? 
When I was young, our homeroom mom(s) made us treats and goodies for the holiday parties.  My mom did this frequently and I always thought I would someday be in that same spot.  I also remember thinking that when I became a mom I would make sure my kids had the most awesome school supplies because I love office products and always have!  

Since I don't have biological children, I just have to love the kids at church that I teach each week.  I always try to give them some back to school goodies.  This year, I decided to put them in fun pencil boxes.


I downloaded this file from the Silhouette online store.  I love it!  These were super quick and easy to make.  I forgot to take pics at home, so I took them on the BRIGHT green table at church.  Kinda hurts the eyes, doesn't it?


If you look closely, you can see that the eraser isn't attached.  That's where the box opens.  I forgot to take a pic of one of them open.


I also found these cute striped pencil boxes at Target for .69!  What a bargain.  I couldn't pass them up (I bought one for myself, too).  I added vinyl lettering to personalize them for my girls.

Here's one more...


I love back to school!

Happy Tuesday,
Cheryl


Tuesday, March 17, 2015

Happy Birthday Padre!


Happy Birthday to my Padre!  

Ok, today isn't his birthday.  It was March 4th.  And, for the record, I don't speak Spanish...not even a little.  

I have a habit of giving people nicknames.  I am not sure when it really started or why.  My husband, whose name is Charles, has about 12 names I call him at various times.  (They're all nice - I promise!)  Several years ago, I started calling my dad padre and it stuck.  I don't call my mom madre, though.  I call her Daisy, yet her name is Barbara.  There's a story behind that, but we'll save that for another day.

Back to the card....

The first card I made with my Silhouette was a box card.  I downloaded the file from svgcuts.com.  I haven't used it since and that was over a year ago.  I really like these cards just because they're fun, so I decided to pull it out for him.


I used various scraps of paper for the card, so I honestly couldn't tell you who makes this paper.

Isn't it festive?


Look at the above picture.  Do you see anything that doesn't belong?  

Look very closely.

The navy balloon on the left is a bit of a mess.  When I was making the card, I wanted every balloon to be a different color, but I didn't have one single piece of patterned paper in navy.  So, I pulled out my trusty white gel pen and made my own.  In person, it blended in pretty well but it seems to really stand out in the picture.  


I used an old stamp I have by The Paper Studio.  I really like the swirly letters, but I'm a little sick of it.  I guess I might have to buy some new stamps.  Oh, darn!  I just hate shopping for crafty things.... said no one, ever!

Have you ever made a boxed card?  I'd love to see your pics if you have.

Blessings,
Cheryl


Tuesday, July 1, 2014

My first SVG

Making SVG's is something I've wanted to try for a while now... and I finally did.  I'm certainly still learning and it's not perfect, but I wanted to share it anyway!

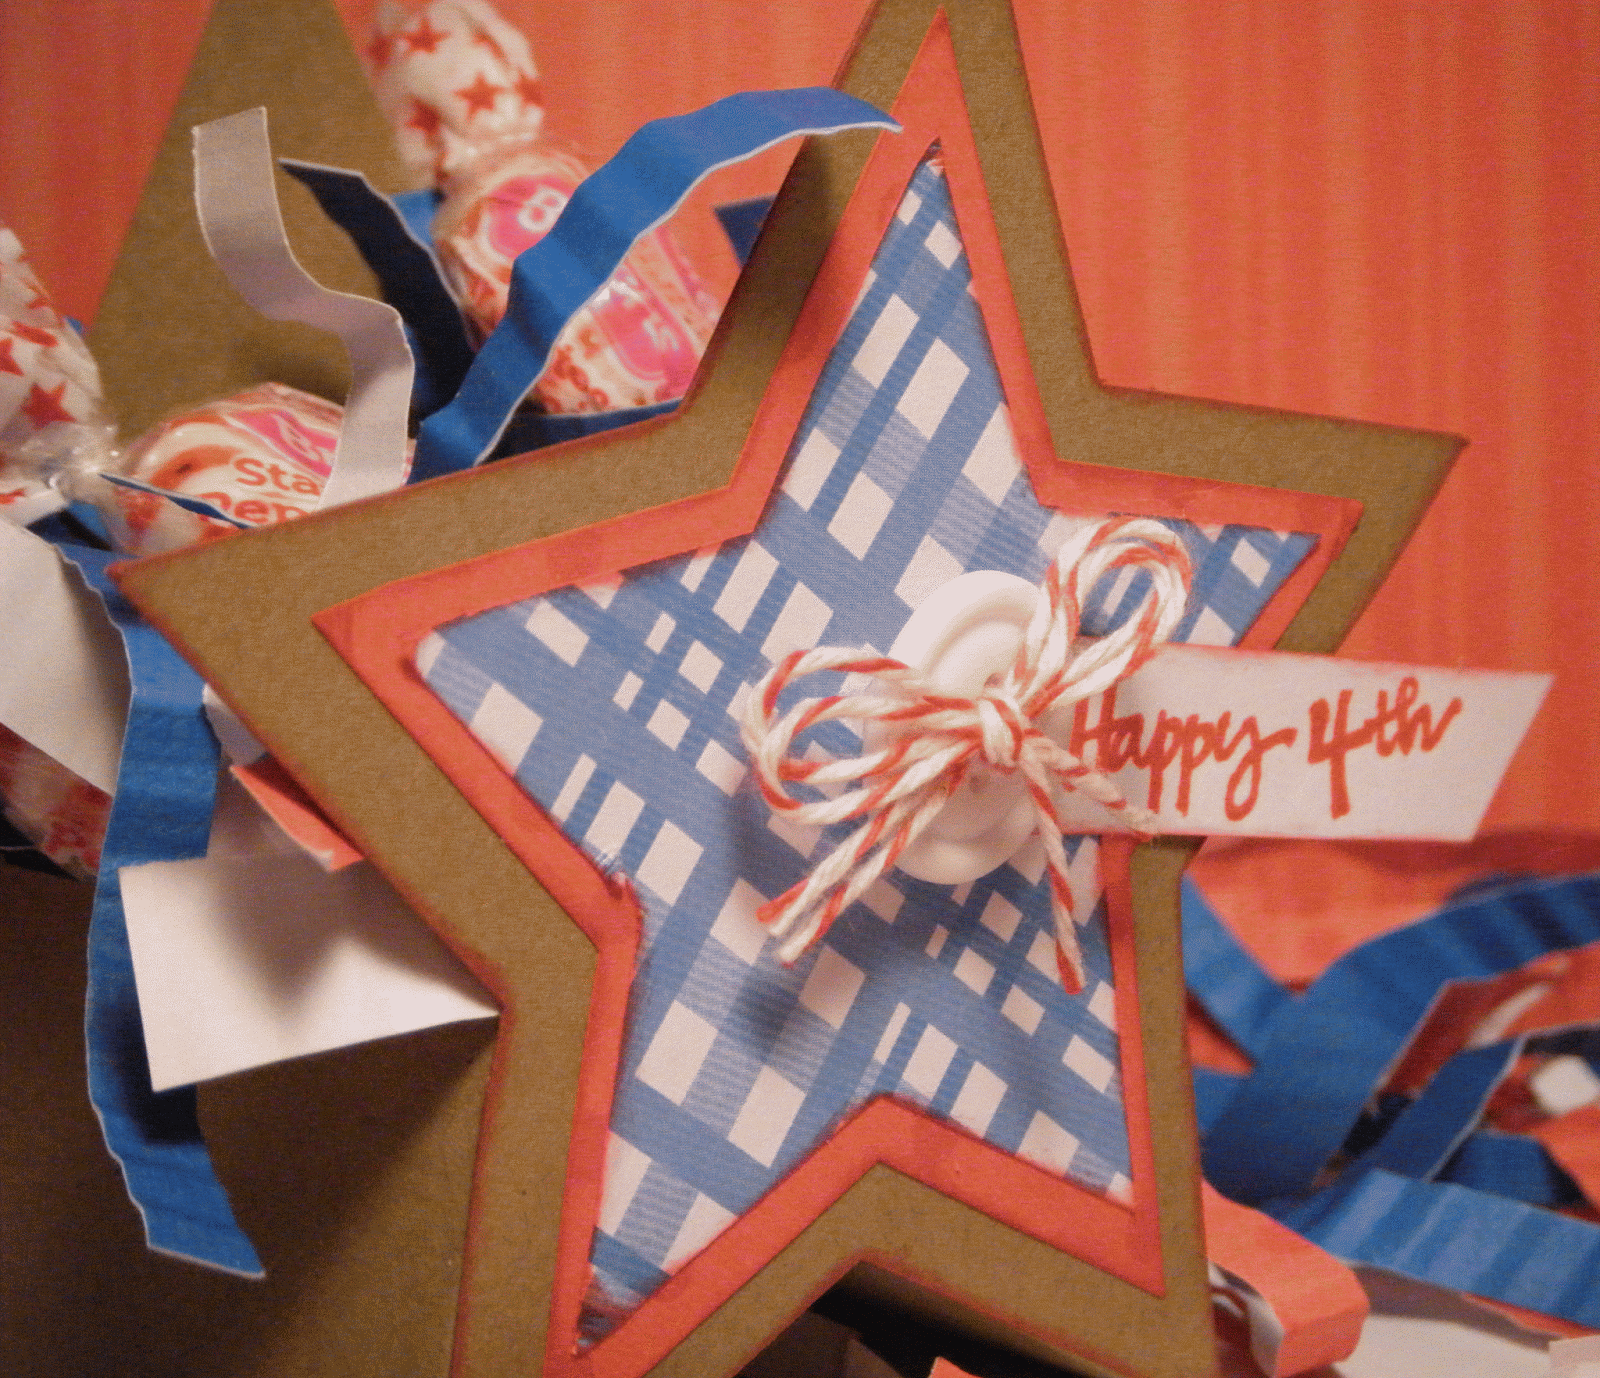
I wanted to make some cute goodies for my co-workers to celebrate Independence Day and I figured "Why not make my own box?".  Here's what I came up with...


Here's my fun little box!


As you can see from the side view, it's open on top and you can fill it with goodies and snacks!  In the file, you'll get the box and the two star layers on the front.  I added a ribbon and some twine on the front.  I didn't have a July 4th stamp, so I just handwrote the sentiment.  Not the greatest, but it will work in a pinch.  I also didn't have any "stuffing" for the box, so I just cut some strips and ran them through my paper crimper.

If you'd like to download the file, you can get it HERE.  Since this is my first try, please send me pics of anything you make.  I'd also love to hear from you guys if you like it or if you don't or if you just wanna say hi!

Blessings,
Cheryl


Wednesday, May 28, 2014

Fun Chapstick Holder

My mom's birthday was a couple weeks ago and in lieu of a card, I made a little "Happy Birthday" chapstick holder.  Here it is...


I got a new paper pack from Hobby Lobby the last time they had a 50% off sale and I've been waiting to use it.  It's called Ninth Street by The Paper Studio.  I {heart} this paper!


I found the dimensions for the chapstick holder online, then designed it on my Silhouette.  The flowers and label are some free SVG's I found on Pinterest.  I cut them out and inked all the edges with charcoal ink.


I adhered three pieces of twine to the teal paper, then added the front and back panels and the embellishments on the front.


I added the strip in the middle and the side panels inside.  I added the chapstick (It's organic by Sierra Bees from iherb.com - Love it!), signed it and voila!  All done!  It was so simple and I think it's nice to do something different from a card occasionally.  I am working on tweaking the Silhouette file, then I'll be offering that for download, if anyone is interested.

I hope you're all having a great week so far.  We're halfway through...

Cheryl


Saturday, November 10, 2012

Cricut Artiste is the bomb!


I got a new cartridge!!!

I am super excited, if you can't tell from the song I was singing above! I got the Cricut Artiste cartridge!  I have stepped over the cliff and fallen in love.  It is fabulous!  As I mentioned in a previous post, I was hesitant only because I am on a budget and it's a bit pricey but I must say, it's worth it.  Of course, as soon as I received it, I had to try it out.  I made these fun pumpkin favors for our November ladies meeting at church.  The picture above is the table decor with a couple of the treat bags.


I used the 3D object on page 32 of the Artiste handbook to make the favors.


They were so quick and simple.  I cut them at 4.00".  I hand cut the stems from some wood grain paper I had in my stash.


The leaves are from Create A Critter and cut at .50".  I embossed the pumpkins using various folders in my Cuttlebug.  The paper is Colorbok.

I put a cute little mint in each pumpkin bag.  This cut is so simple and versatile.  I am sure I will make more very soon!  I would highly recommend this cartridge to everyone.  I can't wait to make more goodies with it!

Blessings,
Cheryl


Wednesday, October 31, 2012

Happy Halloween!


Happy Halloween!

I hope you are all doing well on this nice fall holiday!  I thought I would share one last Halloween project with you.  I had planned on posting these on Sunday, but my weekend didn't go as planned.  

As I've mentioned before, our church volunteers to run a concession stand for the OU Football games every year.  We work for free and then our church gets 9% of whatever the stand makes that day.  We had a game this past Saturday and it was a doozie (is that how you spell it?)!  We arrived at 3:00 pm and worked until a little after 10:00 pm.     Then, we had to walk like 100 miles back to our car.  I realized I'm exaggerating a little here, but after standing on your feet, on concrete for that long, a 1 mile walk feels like 100!  Plus it was really cold and I had a blister on my foot.  We arrived at the van around 10:40 pm and proceeded to sit in traffic for approximately 2 hours trying to get home.  We got on the highway and while driving in horrible traffic, our church van was hit from behind by a young lady in a brand spanking new Jeep Cherokee.  She was too busy playing with her radio and GPS to concentrate on driving.  Priorities, right?  She hit us pretty hard and it hurt! Thankfully, no one was seriously injured and finally an hour later we got back on the road and headed home. 

I'd planned on making these goodies on Sunday but my back and neck started screaming louder as time went on.  When I'd sit at my desk and look down to work, it hurt. So I didn't!  I got an appointment with the chiropractor and I feel a little better now and I know I'll get better by the day.  I finally finished them last night, just in time to bring to work to today to my co-workers.  Here are close up shots of some of them...


The picture quality is bad because I just threw them on my desk and took some quick pics before packing them up last night.  


I cut the boxes from Tags, Bags, Boxes and More 2 at 5".  I tied them up with twine and ribbon and added a stamped sentiment to each.  Some of them have stickers and some have cuts done with the Cricut from Simply Charmed.


I filled each one with a Werthers Creamy Caramel, Werthers Caramel Apple and some Peanut Butter Bars.  Have you ever had these?


Oh. My. Goodness.  They are yummy!  I could chomp on them all day.  Which is exactly why I bought a small package so I only had 2 leftover to tempt me!

That's all for today folks!  Be safe if you go out trick or treating tonight and ENJOY!  My Halloween plans include a trip to the chiropractor, coupon shopping, church and then going home to enjoy one of our holiday traditions...

It airs tonight on ABC, so if you're home, you should watch it!  I love celebrating the holidays with Charlie Brown!

Blessings,
Cheryl