Showing posts with label Serenade Solutions. Show all posts

Sunday, January 22, 2012

Soft Pink Flower Card

Today I want to share a card with you that was inspired by Pinterest.  Have I mentioned this week how much I love that site?  I know I tell you every week.  I can't stay away!

Thursday, January 19, 2012

Scalloped Thank You Card


Do you remember a few weeks ago when I admitted to all you that I was a paper hoarder?  I am happy to say that I've been using up some of my stash.  So, now I have another problem....

Tuesday, November 29, 2011

Simple Birthday Card

Howdy folks!  I hope you're all having a fantastic Tuesday!  Today I want to share a quick and simple birthday card I made for my pal at church.


For the base of the card I used Elegant Edges.  The shape started out as more a square and I re-shaped it in my Gypsy to fit a #10 envelope (approx 4" x 9.5").  I used the shadow feature for the base and welded the two together.  I then cut a layer in black, then white, then added a layer of patterned paper.  Like most paper crafters, I go through a lot of white cardstock.  I discovered it's much cheaper to buy white cardstock in the office supplies area instead of the scrapbooking section.  I have started using this:


I find that it's way cheaper than the cardstock packaged specifically for crafting and it cuts very well with my Cricut.  On Amazon, you can get 250 sheets for less than eight bucks.  I still have a small pack of textured white for fancier things, but this basic cardstock works fabulously for most of my projects.


I stamped the sentiment and matted it on black.  Can you see my snafu on the word "sending"?  The stamp apparently shifted and smeared.  I hate it when that happens.  I cut the flowers using Serenade Solutions from some coral-ish pink cardstock by ColorBok and added a pearl to the center.

This was super simple, but I think it turned out looking nice and elegant.  Have a blessed day!

Cheryl


Products Used:


Saturday, October 8, 2011

Floral Birthday Card

Happy Saturday!  I hope you're all having a great day so far.  I wanted to share a card I made a few weeks ago.  While I was trolling those tempting dollar bins at Walmart, I found this paper and loved it.  So, I made several cards with it.


For the base, I used a shape from Elegant Edges. I welded the shadow to form the base, then cut the other layers in smaller sizes. I inked the edges of each piece with Chestnut Brown chalk ink.


I cut the rounded rectangle and shadow from Tags, Bags, Boxes and More and stamped the sentiment on there in the same brown ink.  (As you can see, I made a card that said "Happy Birthday" and one that said "Girlfriends" both using the same layout)  The flower is from Serenade Solutions. I inked the edges and added a button tied with twine. The flower is attached using foam dots.


I lined the inside of the card with the same pink paper I used on the flower.


I wanted to create a matching envelope because I love this paper so much!  I cut the envelope from Plantin Schoolbook and sized it to fit on my Gypsy.  Please ignore the horrible pictures.  I tried a new light and it looked really good on my camera...ha ha.  When I loaded them on my computer, they looked terrible.  Of course, I've already given the cards away now, so I can't re-photograph!

Thanks for looking.  And....thanks for being a follower!  I love sharing with you all hearing from you.

Blessings,

Friday, September 16, 2011

Flower Thank You

I've been in a creative slump lately.  Don't you hate it when that happens?  I sit down at my desk and stare at the Gypsy screen trying to come up with something.  And I have nothing.  UGH!  So, I choose some paper and still...nothing.  UGH!  And this goes on and on and on.  I have found that if I let this continue, it gets harder and harder to get back in the swing of things.  So, last night, I made myself sit down and make a card.  I must admit - I re-made this card like 5 times because I was unhappy with it, but now I like it!


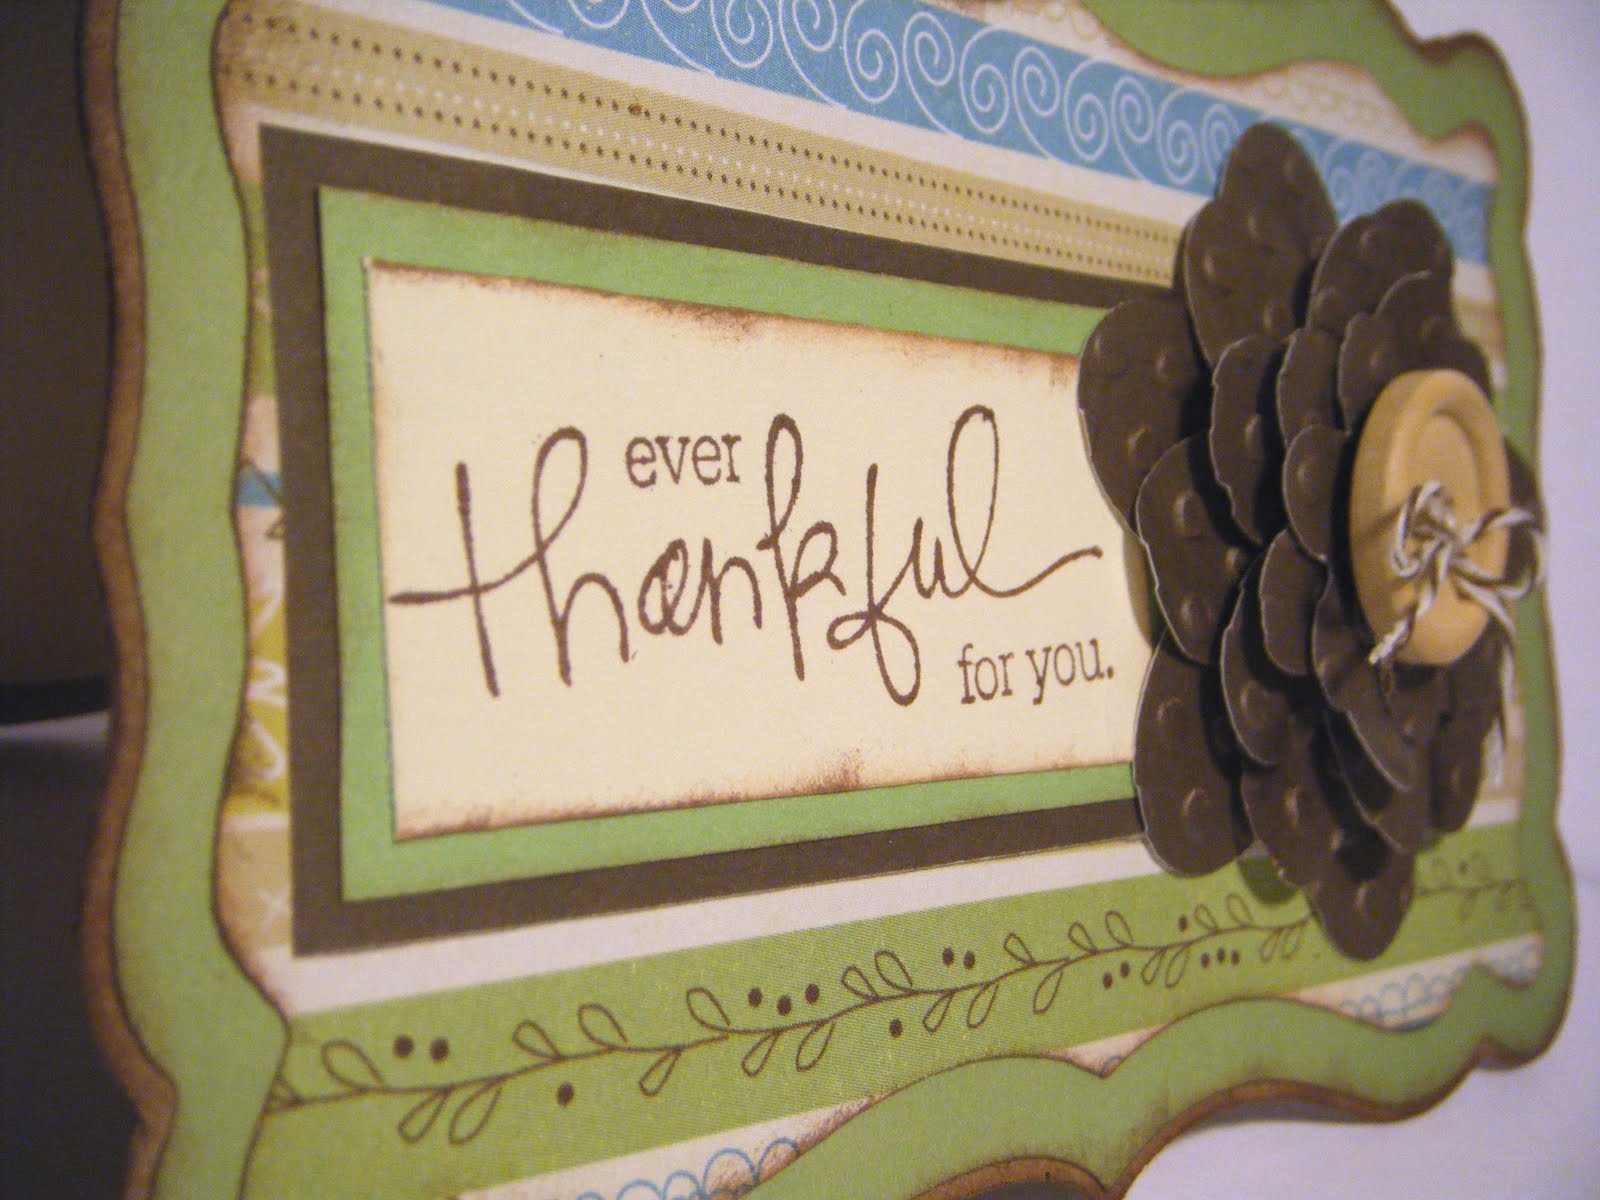
The base and mat are from Ashlynn's Alphabet.  I welded the shadow pieces together to make the base.  I didn't write it down, but I want to say I cut the scallop shape at 3.50". 


I cut the flowers in graduated sizes from Serenade Solutions.  I ran them through my Cuttlebug to emboss them and added a wooden button with some twine.


I used foam to make the flower several layers high and give it dimension.  Now I just hope it fits in my envelope!


The stamped sentiment is from the dollar bin at Michael's.  I inked the edges of everything and slapped it on there - Voila!

I would love to hear from you - What do you do to boost your creativity when you're in a rut?

Blessings,
Cheryl


Sunday, August 7, 2011

Fancy Card

Today I want to share a simple, fancy card with you.  This is one of the thank you cards I made for the order from my photographer friend at church.

bw yellow flower card 1

This card measures 5x5 square.  I cut the flower from Serenade and the stamp is from Michael’s dollar bin.

bw yellow flower card 3

This patterned section is cut from Lyrical Letters.  Doesn’t it just look like beautiful patterned paper?  It’s not!  Fooled ya, didn’t I?  Ok, maybe not.  But it was worth a try.

bw yellow flower card 2

To decorate the flower, I added a black button with some bling stuck in the middle with a glue dot.  That’s it!  Super simple, but I just love it.  I really am liking the bright yellow with the black and white.  Doesn’t that bright flower just make you happy?  You could say it looks…friendly. 

“Don’t you think daisies are the friendliest flower?” 

If you don’t know this line, it’s from You’ve Got Mail.  Totally irrelevant to what I’m talking about but my mind always goes to quotes from that movie because it’s the best…movie…ever.  I know I’ve told you that before.  Can’t help myself!

I hope your day is blessed, happy and cool during this sweltering summer heat!

Blessings,
Cheryl 

Saturday, July 30, 2011

Flowery Thank You!

As some of you may remember, I mentioned a few weeks ago that several folks helped me out and spent a TON of time helping me with my booth at the conference earlier in the month.  Now that I've given them their thank you cards, I can share them with you! 

Lately, I've been totally enthralled with the work of Donna Mundinger over at Popsicle Toes.  She's fabulous at making shaped cards with tons of layers.  This card was inspired by her style.  I am not nearly as talented as her when it comes to layering, but I'm certainly gonna practice!


Here's a front view of the card.  I used Gypsy Wanderings, Serenade and George and Basic Shapes for the card. 


From the front, it's hard to tell how it's put together.  As you can see, the front of the card is shaped and the back is plain.  For the base, I used brown Kraft paper.  The patterned paper is from a stack by Recollections from Michael's.

This is an inside view.  I welded the shadow of the flowers and the phrase to the shape to form the card.  I cut a liner from patterned paper to cover the inside.


For each flower, I cut a few shadows and a few layers of each shape.  I added pearls to the center for accent on each flower.


I put some pearls on the letters because they looked sorta plain to me.  I've never been a big fan of pearls, normally I prefer something more "bling-y", but I am starting to love them after using them on this card!

On several of the blogs I follow, I've read about alot of folks using colored foam and making their own dimensionals, so I tried that with this card.  I bought a big pack of colored fun foam that's sticky on one side.  I've heard about people running it through their Xyron machine to make a sticker, but I just ran a line of adhesive from my ATG gun on it and stuck it on.  If you look closely, you can see a tiny bit of the foam, but since it's color matched to the flowers, it's actually quite camouflaged.  I never thought it would be that much cheaper, but now I'm a believer! 
Here's one last look at the front of the card.  There's just one problem - I didn't leave much room to write without my words showing!  Yikes!  It's for my mom and I know she understands beauty over function, so it's all good!  Things have to look good and then we worry about them being functional!!

Thanks for stopping by today!  I hope you all have a wonderful, blessed day!

Blessings,
Cheryl

Friday, July 8, 2011

Long Time....No Posts!

Happy Friday Everyone!  I feel like I've been away forever.  It's really funny because although I've never met most of you, I really miss you when I don't post.  Isn't that bizarre?  Makes me think of a movie.....

"I pretend that we're the oldest and dearest friends- as opposed to what we actually are- people who don't know each other's names and met in a chat room where we both claimed we'd never been before."

In case you don't recognize it, that's a quote from You've Got Mail.  Best. Movie. Ever. In my humble opinion. =)  Don't know what made me think of that really, except thinking of being friends with all you whom I've never met.  If you haven't seen it, you should watch it.  And if you have, you should watch it again! 

Anyway, I have to apologize because I totally missed posting the project this week from the cartridge of the month for July.  I have it done and saved on my camera, but I've been really busy getting ready for something next week and it totally slipped my mind.  I will get it posted soon, I promise. 

Today I thought I'd share some pictures with you from a long time ago.  I've had these on my thumb drive for a while and am not sure why I've never posted them.  I can't remember which cartridges I used for all of them, but I'll list the ones I do.


These are the sets I made for the order I received for Teacher Appreciation Week back in April.  There were 5 men, so I made the plain, non-glitzy style for them.  This shape is from George and Basic Shapes.


For each one, I covered the binder clip with coordinating paper and then made the bookmark.  You can't really tell from the pics, but the bookmarks are folded in half with a magnet in the middle so they sandwich the page.  I wish I'd taken a picture of the inside.  The tulips are from Simply Charmed.


 I designed the bookmarks using my Gypsy.  It took some tweaking, but it was pretty simple.


I believe this flower came from Serenade, but am not 100% sure of it!  If you are interested in knowing the exact cartridge, please email me and I can check my Gypsy when I get home.
 

 I am going to make some of these over the weekend for the booth I'll have at an event on Monday and Tuesday, so I'll try to take pictures of the inside and post those next week. 


 They are really simple to make and make great gifts!  Thanks for stopping by today and have a wonderful day!

Blessings,
Cheryl

Thursday, May 26, 2011

Almost Friday....

 Hallelujah...it's almost Friday on a holiday weekend!  =)  I love having Mondays off work.  Sundays are a super busy day for me with the things I do at church, so it's always nice when I have a Monday off.  

OK...on to more important things.  A friend asked me to make 3 cards that would hold gift cards/certificates for some friends who are retiring.  I don't have a single stamp or cricut cut (that I can find) that says Happy Retirement.  UGH.  So, I settled on more generic phrases and she can write in what she wants.  

For the outside of the first card, I cut the flower from Serenade.  I cut 4 sizes, 2 of each size and then layered and crumpled them.  I used pop dots to raise up each layer and added bling to the center.


For the inside, I designed a pocket on my Gypsy for the gift card and attached it with my ATG gun.  I then used a corner punch for the mat on the other side.  I have had this paper in my stash FOREVER and I don't know why I've never used it.  I really like it.


For the second card, I cut the base from Birthday Bash.  I added the patterned paper on the front and added the mat with the stamped sentiment.  The flower here is from a punch and I just layered it 3 times.  I inked the edges with some aqua-ish ink. 


For the inside, I made another gift card pocket and then added a mat using the same paper from the front.


For the last card, I made the flower on the front from circles.  I saw this on another blog and loved the idea.  I have the link save somewhere and as soon as I find it I'll be sure to share and give credit where it's due.  I will also be posting a tutorial on how to make these flowers.  They are SUPER easy and fun!

 
On the inside, another pocket and mat with bling on the other side.
 

I hope they like them!  As you can probably tell, the background in the photos is a little crazy.  With all the tornado mess on Tuesday night, I never set up my light to take pictures so I just brought them with me to work so I could snap a few shots before handing them off to my friend.  I've got several more cards to make tonight, so I will share those hopefully on Friday.

Blessings,
Cheryl