Showing posts with label Cuttlebug. Show all posts

Saturday, November 10, 2012

Cricut Artiste is the bomb!


I got a new cartridge!!!

I am super excited, if you can't tell from the song I was singing above! I got the Cricut Artiste cartridge!  I have stepped over the cliff and fallen in love.  It is fabulous!  As I mentioned in a previous post, I was hesitant only because I am on a budget and it's a bit pricey but I must say, it's worth it.  Of course, as soon as I received it, I had to try it out.  I made these fun pumpkin favors for our November ladies meeting at church.  The picture above is the table decor with a couple of the treat bags.


I used the 3D object on page 32 of the Artiste handbook to make the favors.


They were so quick and simple.  I cut them at 4.00".  I hand cut the stems from some wood grain paper I had in my stash.


The leaves are from Create A Critter and cut at .50".  I embossed the pumpkins using various folders in my Cuttlebug.  The paper is Colorbok.

I put a cute little mint in each pumpkin bag.  This cut is so simple and versatile.  I am sure I will make more very soon!  I would highly recommend this cartridge to everyone.  I can't wait to make more goodies with it!

Blessings,
Cheryl


Monday, October 15, 2012

Imitation!


Imitation is the sincerest form of flattery, right?  Today's card is my imitation of an unknown, talented crafter on Pinterest!  I saw this card a few weeks ago on there, but the link doesn't work, so I can't give credit the original creator.  So, if you're out there, thanks for the card inspiration!


I loved idea of the little picket fence.  I used Wrap It Up for the fence.  After I cut it, I ran it through my Cuttlebug using a wood grain folder.  I inked the edges with brown chalk ink.  I adhered the fence using foam dots to make it stand out.


The flower petals and center are from Flower Shoppe.  I layered many of the flowers and inked all the edges in brown.  I stamped the sentiment and hand cut the pennant shape.


Here's what I did to the inside of the card.

That's it!  Super simple, huh?  My brain is now thinking of more fence card ideas.  I think it would be cute to cut the fence in different colors and do all kinds of flowers.  Although the card is quite simple, I am really fond of it. 

I'm so glad you came to visit Pink and Paper today.  I know I've said it before, but it's the highlight of my day to get to share things with all of you.  Thanks for reading!

Blessings,
Cheryl

Wednesday, March 14, 2012

Flower!

Happy Wednesday!  Surprise!  I have yet another card with a flower on it to share with you....but first, just a note...

Wednesday, February 15, 2012

Back to Normal...

Happy Wednesday!  I feel like it's been forever since I've been around here.  What a busy, busy past few days!  As I mentioned in my previous post, we had been preparing for a big dinner at church on Monday night.  We worked all day Saturday decorating, then worked all day Monday cooking.  I thought it turned out to be a fabulous evening and the dinner got great reviews!  I also have to mention that I have the best pals in the world at church - everyone pitched in and worked until exhaustion to make sure things were just right.  I took Tuesday off to recuperate and now I'm back to normal life, I think.  =) 

I have a bunch of cards to share with you so let's get to the first one...

Sunday, January 22, 2012

Soft Pink Flower Card

Today I want to share a card with you that was inspired by Pinterest.  Have I mentioned this week how much I love that site?  I know I tell you every week.  I can't stay away!

Sunday, May 8, 2011

Love you a Latte!

Most of the time, I’m not much for puns, but I really ended up liking this card.  I made it for my mother-in-law for mother’s day using Just Because Cards.  I have never used this cut before, so I sorta experimented with it.  The paper is from KI Memories. 

latte 2

I used the Candy Cane Stripe Cuttlebug folder to emboss the coffee pot.

latte 3

I added stitching to the letters with my white signo gel pen.  The circle was embossed using the Swiss Dots Cuttlebug folder.

latte 5

latte 6

I added a pink mat with some of the patterned paper to the inside of the card.

latte 4

I used an envelope from my stash that matched the color scheme and cut out a the little coffee pot icon to use for a seal.

latte 7

I wasn’t sure I was in love with the paper or the cuts, but once I put them together, I really liked it! 

I made several cards this weekend, so I’ll be sharing the rest this week. 

Blessings,
Cheryl

Saturday, March 26, 2011

My first window card…

Happy Saturday to all of you!  I hope your weekend is starting off wonderfully.  I am finally feeling back to normal after a full week of being sick and trying to get over it…ugh!  That was some nasty crud I had!
I’ve seen people make what I call a “window card” many times, but I have never attempted one, so I decided to try.  I just got Birthday Bash, so I used that for this card.  I created the card base using George & Basic.  I designed it all using my Gypsy.  I made a liner from white and embossed it using the Swiss Dots Cuttlebug folder.  It was a little time consuming, but I am loving it!  It’s hard to photograph to show the card properly, but here’s what I have to show you.
birthday window banner card 5birthday window banner cardbirthday window banner card 2
I will have a few more cards to share tomorrow.  Have a fabulous Saturday!

Tuesday, February 15, 2011

Happy {Belated} Valentine’s Day!!

I hope you all had a wonderful Valentine’s Day!  I apologize for the delayed post; I was swamped yesterday and forgot to get this posted.  Every year we host a large dinner at our church that I help plan and it was yesterday.  It went really well, but it’s a long day of cooking and decorating and hard work. 

Now…onto the paper crafts!  I made valentines for the kids on my class at church and thought I’d share.  I made boxes based on the tutorial here.  These are super easy and super cute.  It was a ton of work, but my kids really like them, so it was well worth it!  I have tons of pictures, so here we go….

DSCF7303

DSCF7282DSCF7287DSCF7290DSCF7293DSCF7299

DSCF7174DSCF7175DSCF7183DSCF7207DSCF7213DSCF7219DSCF7228DSCF7239DSCF7241DSCF7257DSCF7265DSCF7267DSCF7277

signature plain

Monday, February 7, 2011

“You Say It’s Your Birthday” Blog Hop

Welcome to the “You Say It’s Your Birthday Blog Hop.  I am pleased to be a part of this fun and happy event! You should have arrived here from Heather’s blog.  If not, you can start hopping at Erika’s blog.  Erika, over at Cricut Love, is our host for this hop and she’s done a wonderful job!  We have some great sponsors and Erika has some awesome giveaways, so be sure to check our her post for all the details. 
Erika’s daughter, Ashley, is having a birthday and that’s what we’re celebrating!  She and Ashley are HUGE Beatles fans, so we were asked to make a project inspired by one of their songs.  I am not familiar with a lot of their songs {{{GASP…I know!}}}, so I just looked through some of the titles and chose one.  I chose Strawberry Fields Forever as I’m sure you can tell from my pics!  I hope Ashley loves her card and has a wonderful birthday. 
DSCF6985
DSCF6987
DSCF6989
DSCF6995
DSCF6996
I used Smiley Cards for the base and the oval shaped mats and Simply Charmed for the strawberry.  I used the hide contour feature on my Gypsy to take the face off the strawberry.  The strawberry was embossed using the Swiss Dots Cuttlebug folder and then I inked the dots with some red chalk ink.

Your next stop on the hop is Melin @  Cooking with Cricut.  Head over there for more fun!

Here’s the list of blogs, in case you get lost along the way.
Erika- http://www.cricutlove1.blogspot.comabby/
Abby-
http://www.scrapbookaholicbyabby.com
Janis- http://www.pausedreamenjoy.blogspot.comsandra/
Sandra-
http://www.365daysofcricut.blogspot.com
Raven- http://www.love4stamps.blogspot.com
Carley- http://the-real-icarley.blogspot.com
Lauren- http://www.laurenscraps.blogspot.com
Stephanie- http://www.alwayscrafting.com
Jess- http://myscrapdiary-jess.blogspot.com/ Corri- http://www.buglvr.blogspot.com/ Jennifer- http://kozfams.blogspot.com/ Melissa- http://apaperjourney.blogspot.com/ Lisa- http://crop-and-create.blogpot.com/ Elsa-http://cricutlvr.blogspot.com/ Glenda- http://glendascards.blogspot.com/ Heather- http://princesspaperprojects.blogspot.com/ Cheryl- http://pinkandpaper.blogspot.com/ <== You are Here!


Thanks for stopping by and have a blessed day!!

signature with numbers scrip

Friday, October 15, 2010

My Pink Stamper Challenge - Monkey Treat Bags

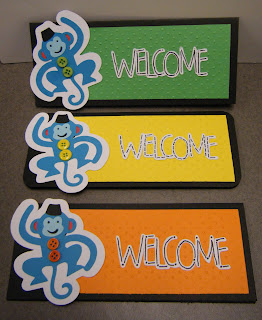
Robyn over at My Pink Stamper is having a challenge to create something to give to someone else. I'm the Children's Pastor at my church and have been wanting to have some goodie bags to give to guests in our classes. We have several age groups, so I started with something for the younger boys. I'm going to make more styles...but here's what I have so far. These are bag toppers. The bags will be filled with candy and little toys.

Blessings,